Objects Databases
Overview
- Figure 10: Object Databases module screenshots
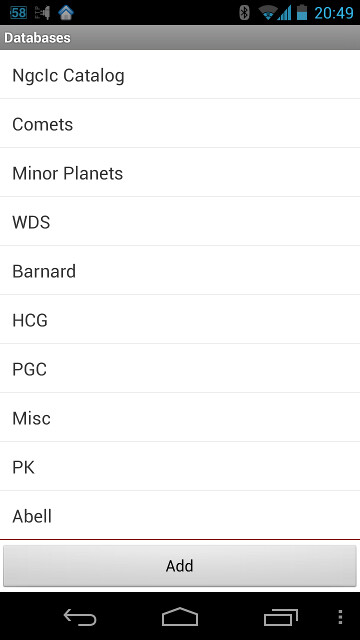
(using bright theme)

(in the night mode)


Objects Databases module provides tools to work with various DSO Planner databases of objects on the Android device (Figure 10). You can add you own databases and they will be treated by DSO Planner engine the same way as internal ones, including but not limited to the functions provided in Object Selection module, Global Search, Observation Notes, Observations Lists module, and Star Chart module. This unique feature greatly enhances application functionality as users could create any number of own databases for their needs and easily share and distribute them around.
The main screen of the module shows the list of databases available for DSO Planner on the Android device.
Tap the database row to open it, using the View Database module, where you can edit it, add new items, e.t.c.
Editable Integrated Databases
Several Integrated databases of DSO Planner allows to add new objects of the similar kind to them or edit existing objects' records right through the database list screen. The format of the data in these databases explained below. To edit object in such a database - long tap on the object to open its context menu an select the "Edit" item. To add a new object or import a list of objects from the SD card - use the main menu of the database list screen.
Comets
- name1 — Short name of the object
- name2 — Long Name of the object
- comment — free note text
- month — Orbit elements' Epoch month
- year — Orbit elements' Epoch year
- absmag — Absolute star magnitude
- day — Orbit elements' Epoch day
- e — Orbital Excentricity
- i — Inclination to the ecliptic, J2000.0 (degrees)
- node — Longitude of the ascending node, J2000.0 (degrees)
- q — Perihelion distance (AU)
- slope — Star magnitude slope parameter
- w — Argument of perihelion, J2000.0 (degrees)
Minor Planets
- name1 — Short name of the object
- name2 — Long Name of the object
- comment — free note text
- month — Orbit elements' Epoch month
- year — Orbit elements' Epoch year
- G — Star magnitude slope parameter
- H — Absolute star magnitude
- M — Mean anomaly at the Epoch (degrees)
- axis — Semimajor axis of the orbit (AU)
- day — Orbit elements' Epoch day
- e — Orbital Excentricity
- i — Inclination to the ecliptic, J2000.0 (degrees)
- node — Longitude of the ascending node, J2000.0 (degrees)
- w — Argument of perihelion, J2000.0 (degrees)
See the Use Case for converting the asteroid data from the NASA JPL HORIZONS orbit elements.
- Fields — Show all of the custom fields of the database.
- Remove database — Remove the database (delete it).
Gestures
There are two simple flick gestures available, that could be called throughout the application for calling Menu (flick up) and returning to the previous window (flick left). See the Main Concepts, User Interface chapter for more details.
User Database
- Adding new user database
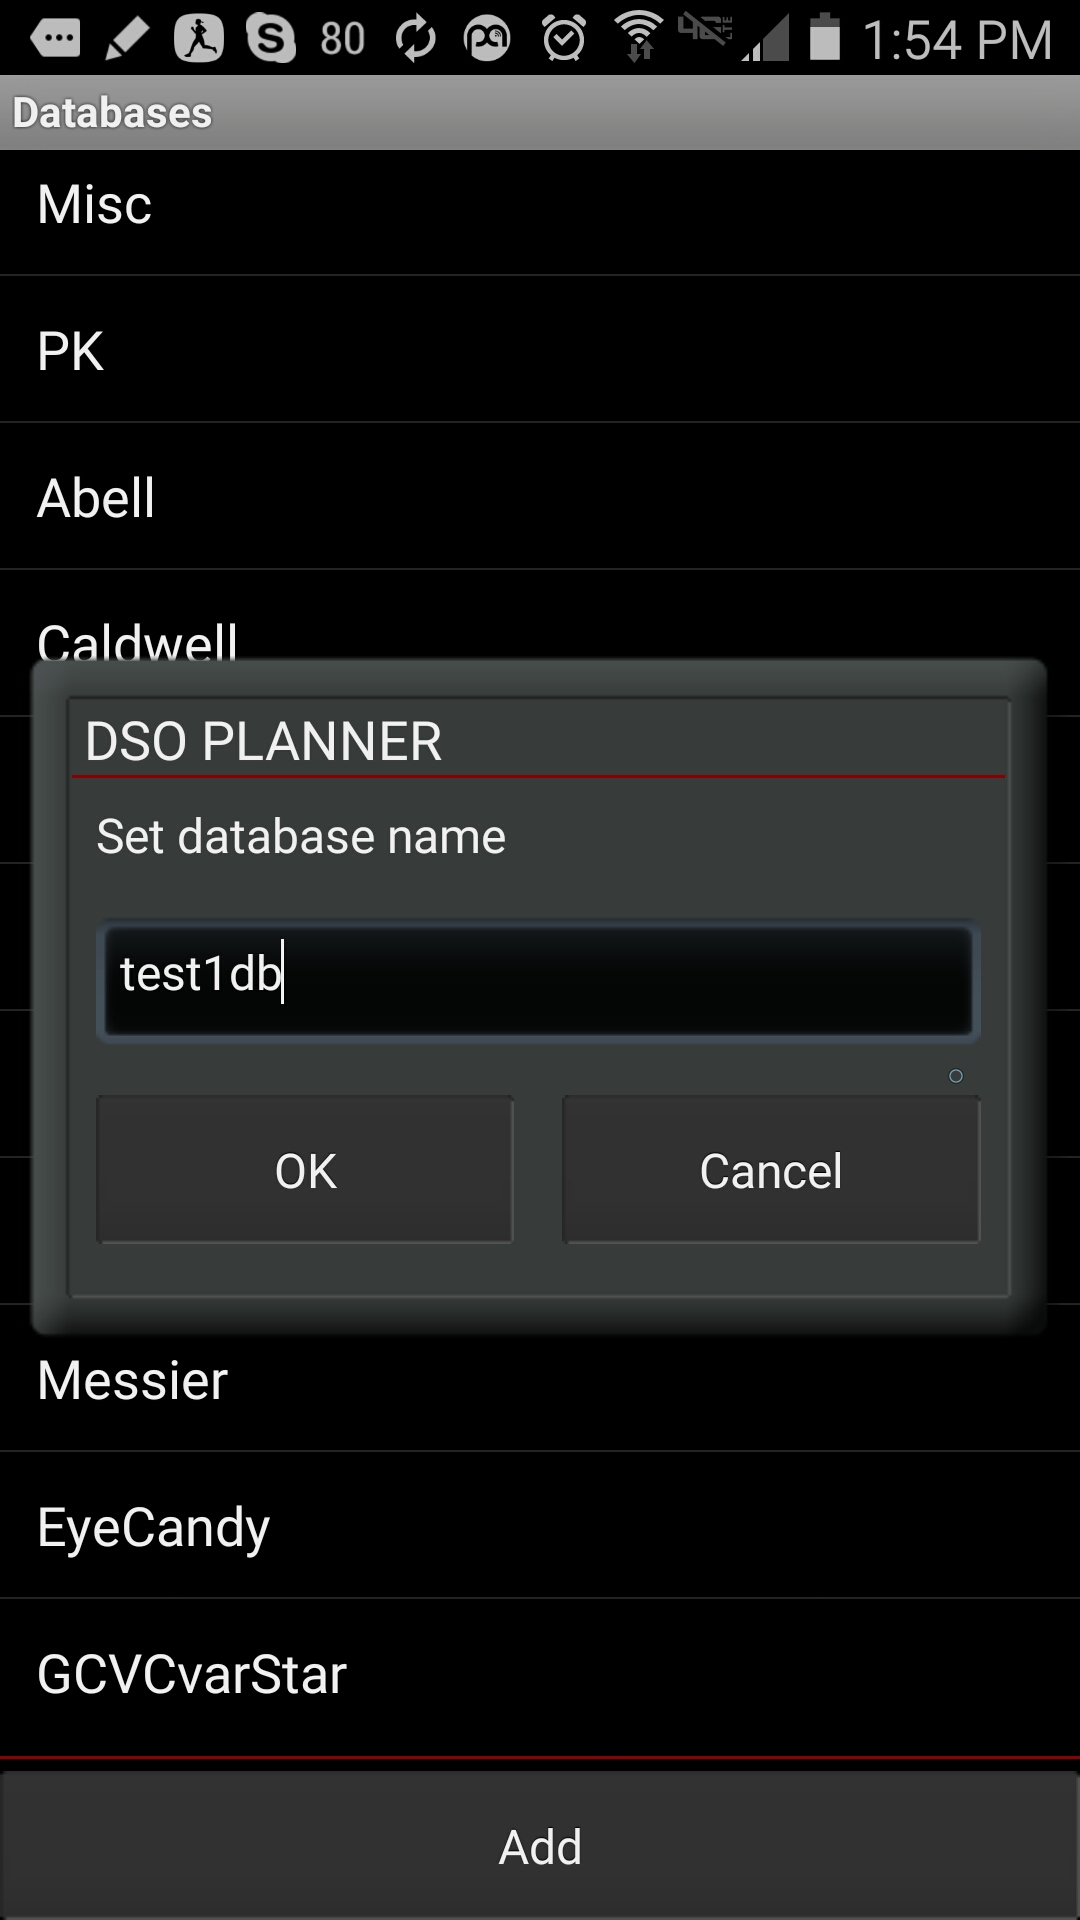
(Click Add and enter the new DB name)
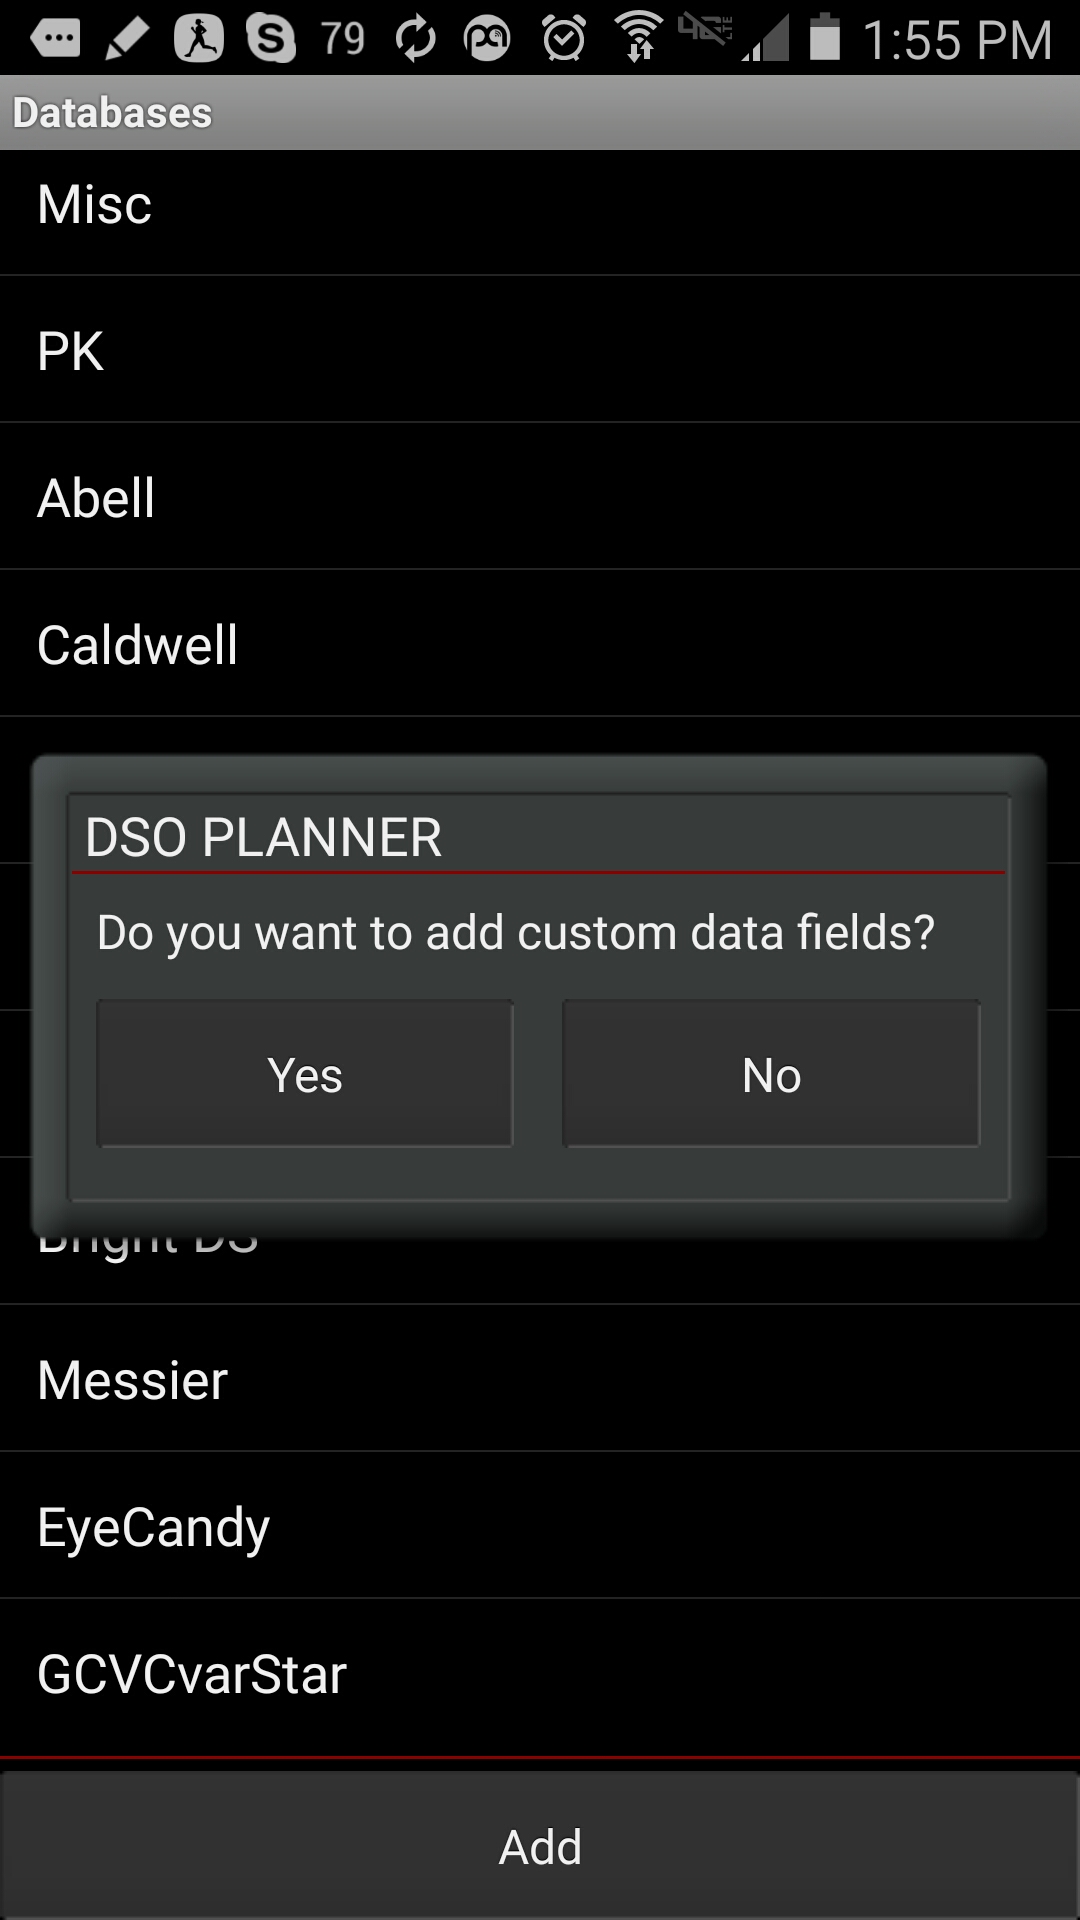
(Decide on custom fields)
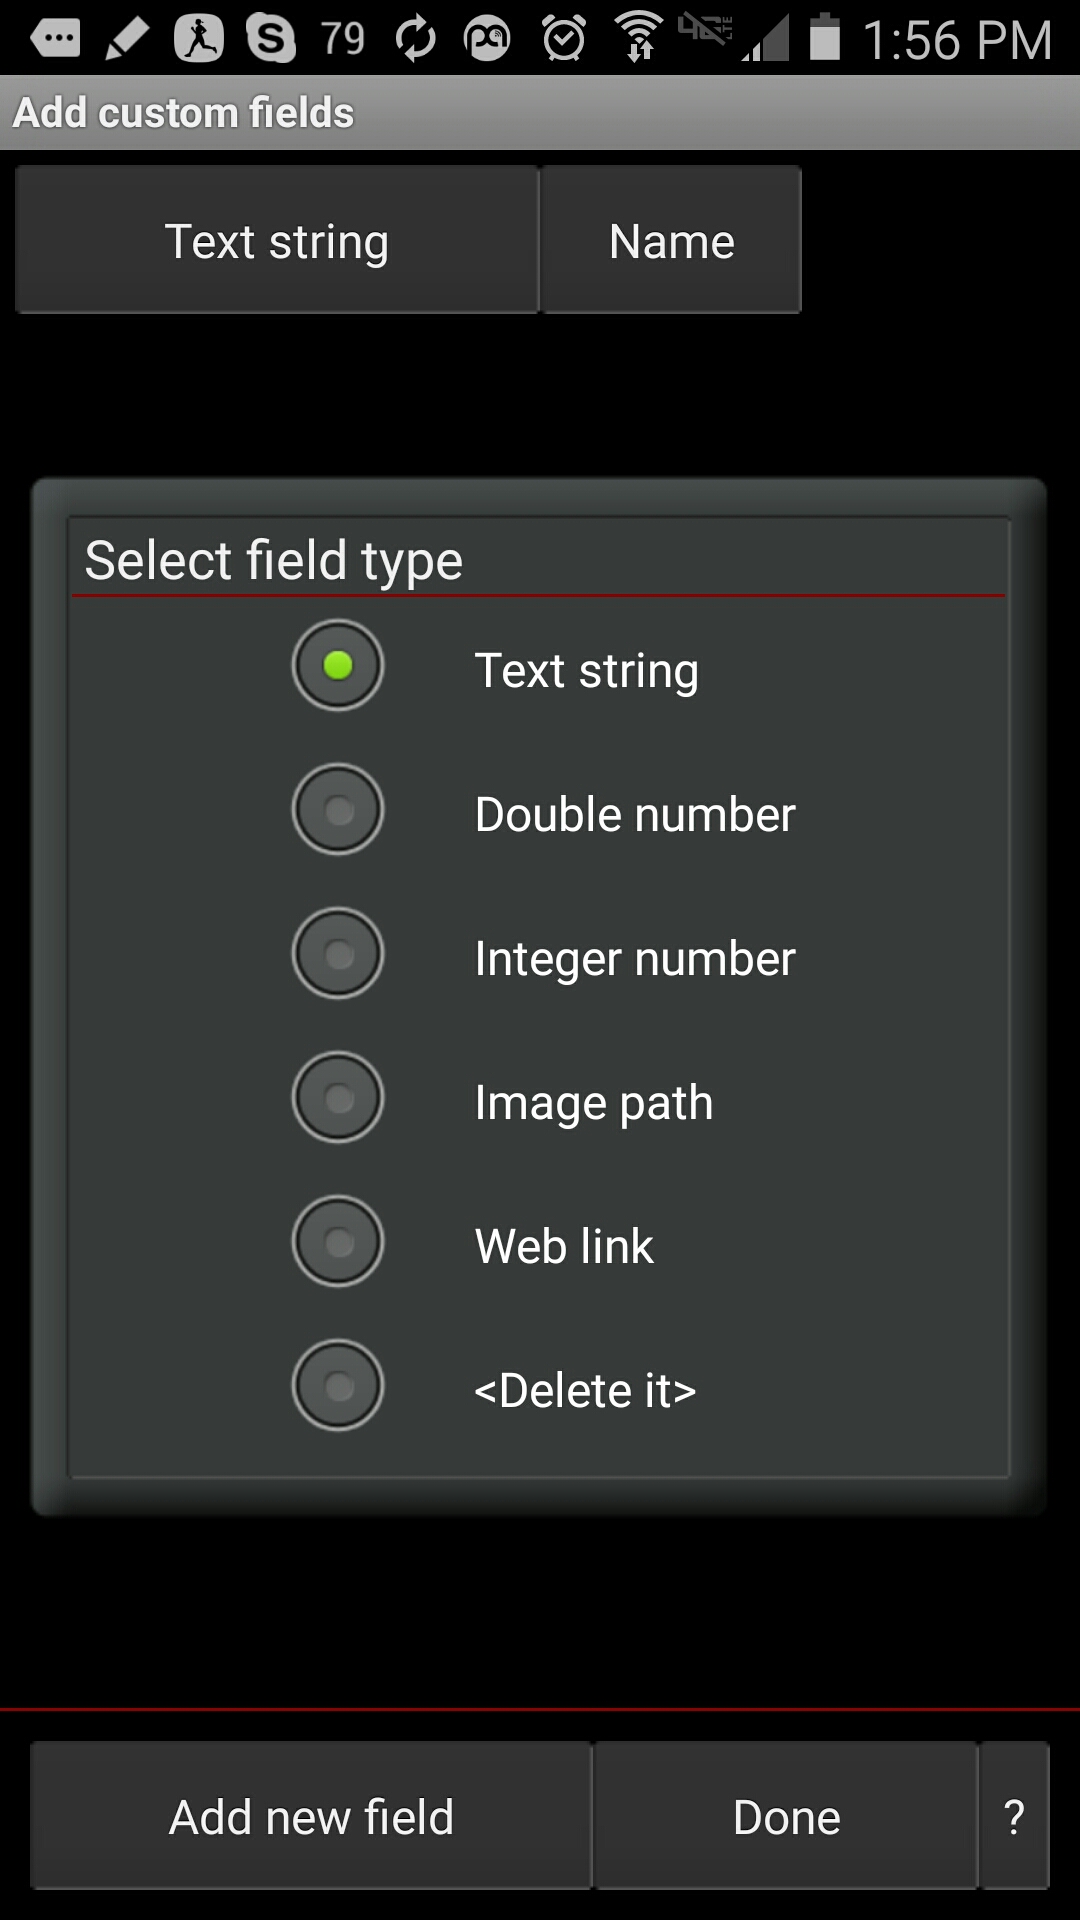
(Add custom fields names and types)
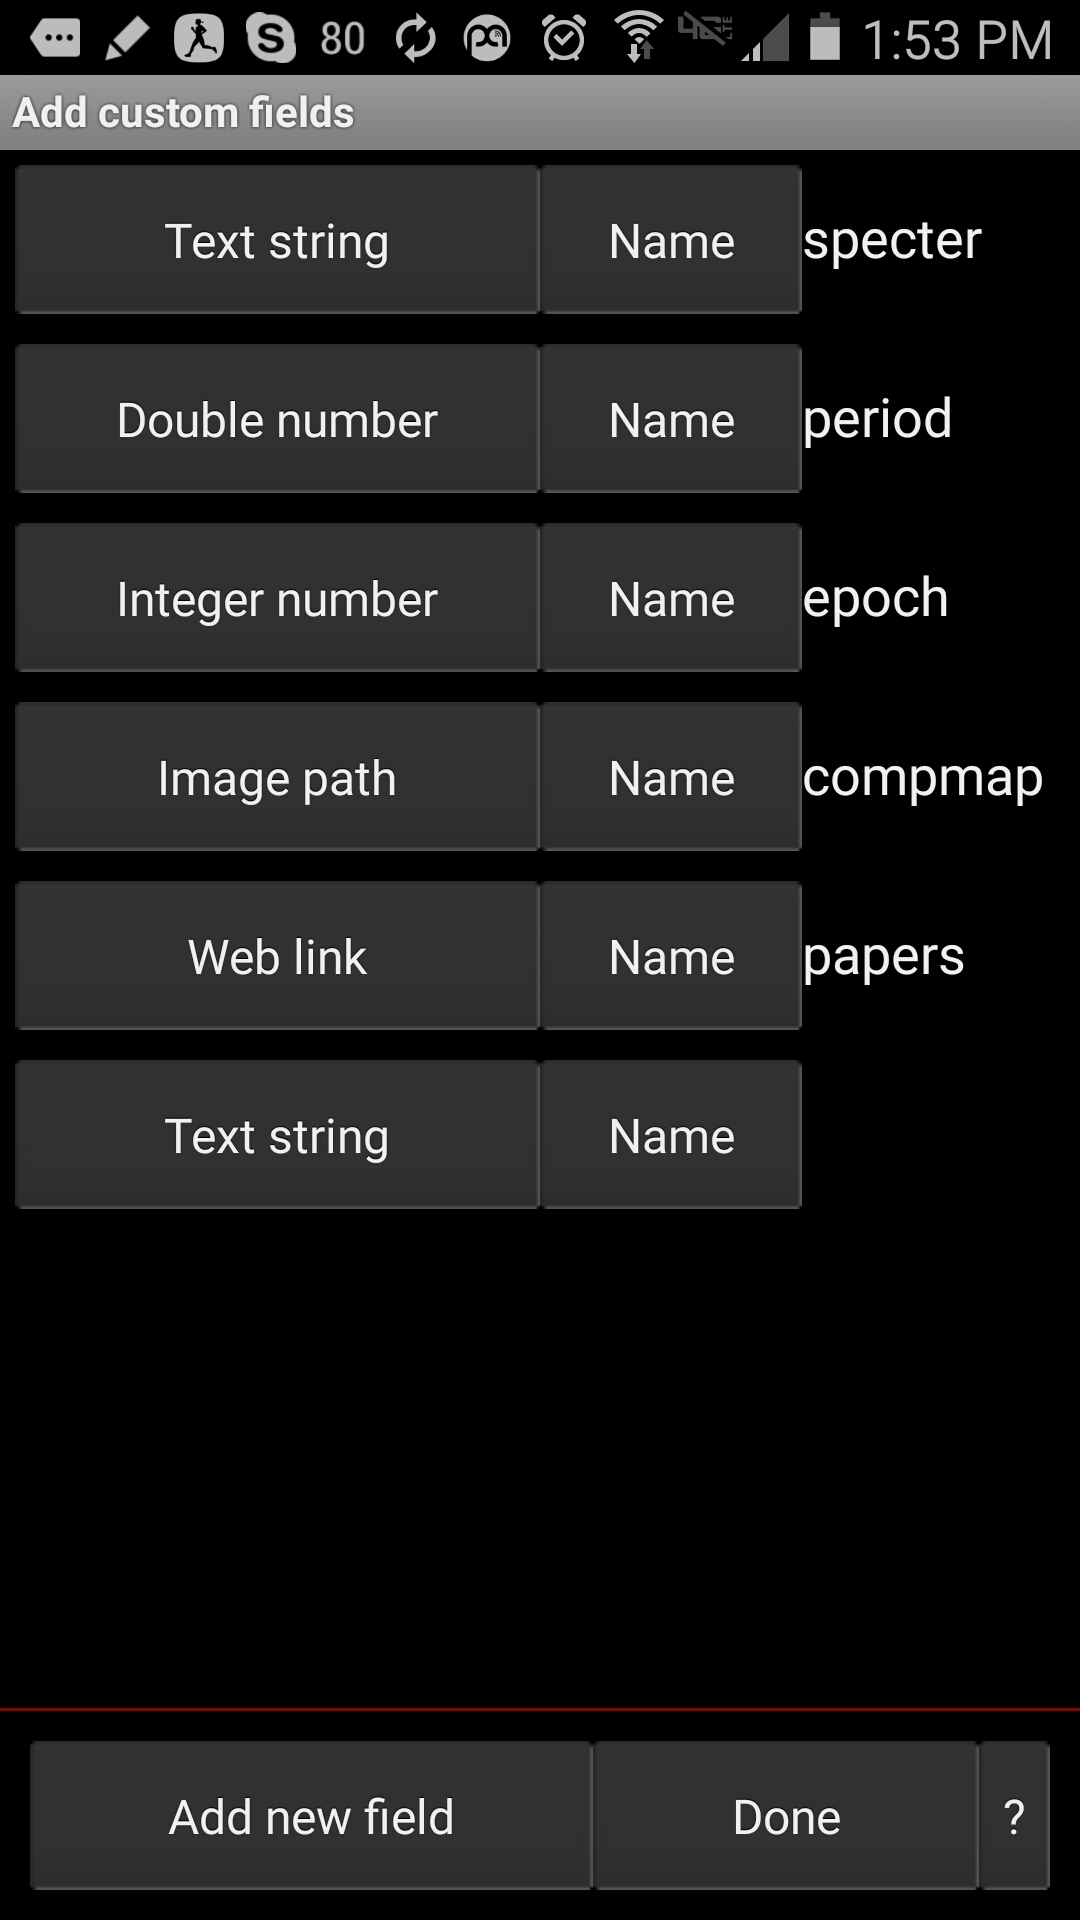
(Edit custom fields before clicking Done)


Creating User Database
To create a new user database — tap the Add button at the bottom of the databases list. Set the name of the database in the dialog provided and decide if you want to add custom fields to it or not. When there are no custom fields required — the new database will be created with the set of default, standard data fields, similar to the NGCIC database. You can add any number of custom data fields of various types (Text String, integer, etc.) to your database. They are not only for the information representation, but also to define interaction model (eg, the Image Path type field will allow to open that image for preview). See the Data formats section for more details.
Import data
After creating the new database you can import the data into that database from a special text file, containing rows of records per object with pairs of name=value; defining the object's information. Open the database from the databases list and select the "Import" option from the main menu of the View Database screen. Then navigate to the file you want to import and select it. The importing procedure may take a while for large files, so its progress and status will be displayed in the standard Android notifications area.
Note, that for a successful data importing you have to make sure the custom field names, which you have defined for the new database, are matching the field names in the database you plan to import exactly. Keep in mind though, that it is possible for the import file records to omit any number of nonessential records (i.e. if they are not available or have no value assigned). So you may need to refer to the importing instructions to that file or review the entire file to recover all of the custom fields' names used. There is NO way to edit data fields after the database is created. The records (lines) with the fields which was not defined in the new database will not be imported (skipped during the import loop).