Object Selection module
Overview
- Figure 1: Object Selection module screenshots
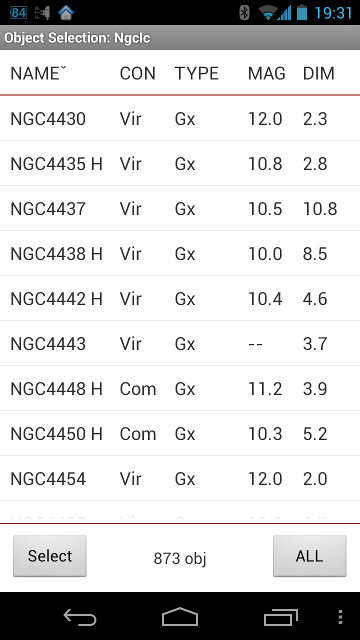
(using bright theme)

(in the night mode)


The Object Selection module provides a screen for easy management, selection, and filtering of different object databases (Figure 1).
- Select/Update button either takes you to the Select Conditions screen where you set object catalogs to search in and filter criteria (Select button), or performs a search in the selected catalogs based on filter criteria (Update button). After the search the list of objects from the current database complying with the filter criteria is displayed, and Update button turns into Select button. While the search is running the Stop button appears. Press it to stop the current search (e.g. if it takes too long). All objects found till the Stop button press will be displayed.
- Select button turns into Update button if some of the search criteria changes (e.g. location, observation time range, etc).
- Constellation (ALL) button on the right allows to filter search results by constellation.
Touching an object in the list takes to the star chart with a touched object in the center. Context menu provides a wide range of operations from forming observation list to note taking.
The list has the following columns: NAME, CON (constellation), TYPE, MAG (magnitude) and DIM (dimension). Touching column name sorts the list by that parameter. Second touch reverses the sort order.
Main Menu
- Search — Global Search of an input string in all databases.
- Export, Share — convert list to text file and allow to share it with other applications.
- Find, Next — Search the list for a sub string of text in the object name.
- CheckBoxes — turn on/off display of checkboxes on the right side of the list, used to mark objects for batch operations (e.g. adding marked to the observation list).
- Side Chart — split the screen in 2 panels, adding the Star Chart view on the top (on the right in tablet mode). Touch object's record in the List to center the object on that Star Chart. Touch the record again or hold your touch on the Side Chart to show that object on the full screen Star Chart.
Context Menu
- Show image — Show images for NGCIC objects, and custom catalog objects if they have ones.
- Add to Observation List — Add the object to the current observation list (one of the four). Current observation list could be changed in Observations Lists module.
- Add Marked to Observation List — Add marked objects to the current observation list.
- Add All to Observation List — Add all objects from the current Object Selection list to the current observation list.
- Details — Shows object's Details screen.
- Add Note — Shows Observation Notes module in the "Add new note" mode.
- See Object Notes — Shows list of notes made to selected object.
- See ALL Notes — Shows all notes in the Notes database.
Gestures
There are two simple flick gestures available, that could be called throughout the application for calling Menu (flick up) and returning to the previous window (flick left). See the Main Concepts, User Interface chapter for more details.