Details screen
Overview
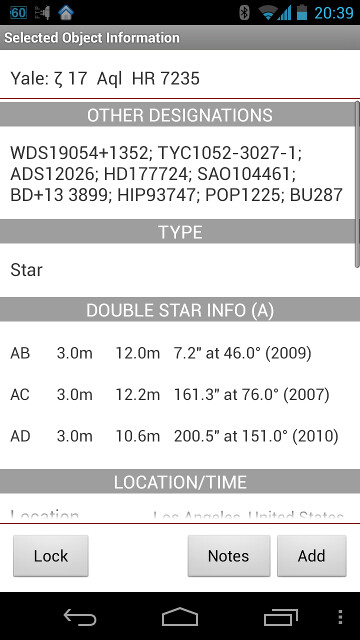
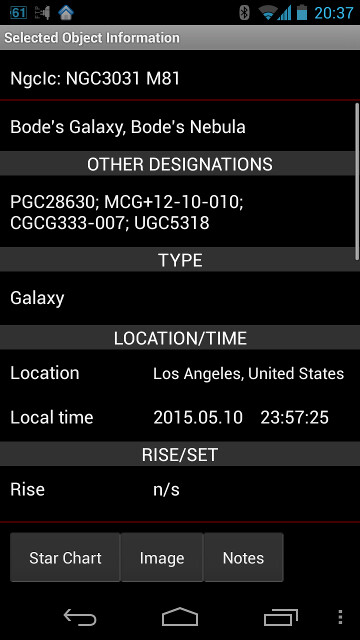
- Figure 9: Object Details module screenshots
The Details module presents all of the offline information available for selected object (Figure 9).
An object to show details for could be selected in the Object Selection module, Observations Lists module, Star Chart module and several other places throughout the DSO Planner user interface. Watch for "Details" context menu items.
The module will automatically search
- all databases for objects with the same name;
- internal databases for the same object even if it's named differently;
- Steve Gottlieb Notes for extended notes on selected object.
If any alternative databases has additional information for the object the "More" button will pop up at the bottom of the module screen. Tap it to show the information found. For each new match found only custom fields will be displayed.
Useful Hint
That is a straightforward way to supplement object data from any existing database with the additional data you want to have available at hands. For example, if you want to supplement the integrated NGCIC database with your own object name (i.e. in your native language) and some colorful images - you could create a standard DSO user database with additional text and images folder path columns and populate it with data using Import functions and USB file transfer. Now, the Details screen for any NGCIC object will show its other name and the gallery of images. See the corresponding use case for more details.
For double stars the module provides Information panel with positional angle and separation for each component from Yale Bright Star Catalog, WDS (Washington Double Star Catalog), and the database of Brightest Double Stars. For about 1000 double stars positional angle and separation will be recalculated using known orbital parameters of these double systems.
Screen Content
- Other Designations — Object names from database of objects' cross-match names (from other catalogs).
- Double Star Info — Position angle and separation for each component.
- Type — Object type.
- Magnitude — Object magnitude.
- Dimension — Object dimension in minutes.
- PA — Object position angle.
- Per EP visibility — An array of object's visibility ratings for each eyepiece selected.
- Location — Current latitude and longitude of observer location.
- Local time — Device time for which object position is calculated (as set in the Star Chart module). Android OS timezone will be taken into account for calculations.
- Constellation — Object's constellation.
- Az/Alt — Object azimuth and altitude for the local time.
- Transit — Time of object's transit and its altitude at that moment (maximum altitude).
- Rise — Object's rise time (could be n/r - never rise or n/s - never sets).
- Set — Object's set time.
Controls
There are up to 4 conveniently even spaced buttons available at the bottom of the module screen. Depending on the current state some of them might be hidden or have different, context dependent functionality.
- Star Chart/Lock — Switch to the Star Chart module with the object centered. If Details Screen is called from Star Chart - that button will be replaced with the Lock button, which allows to set the mode which prevents accidental selection of other objects on the Chart by tapping it. To turn off that mode - return back to Details screen and tap the Unlock button.
- Image — Show images for both Ngc objects and user database objects containing images. Hidden if no images for the object found.
- Notes — Show all observation notes for selected object and allow to take a new observations note.
- Add — Add selected object to the current observation list. The button is hidden if the object is already in the current observation list.
The GoTo button will appear in the the top right corner when the Bluetooth connection with a telescope is established, and allows to control the telescope (point to the object).

